Monday, March 19, 2012

Irish Post

I thought I'd post these creations on my craft blog even though I posted them on my family blog too. I promise not to re post anything again, but I wanted these creations to be included. It was almost rude to them if I didn't.


I bought this charger plate at Wal-mart clearance for $1. Getting the words to cut right on my Silhouette was a little tricky. I haven't figured out how to write words in a shape in the silhouette program. So my handy husband who uses Adobe Photoshop regularly, did it in photoshop and then traced it in silhouette.


This is my famous horseshoe. It was featured on Night Owl Crafts and was the inspiration behind this blog. I used my handy scroll saw to cut it out, the hubby's drill to make the holes, painted, antiqued and attached some shamrocks I found at Joanne's with some cute twist wire. I love it!


These Irish blocks I made with my silhouette as well. I cut the vinyl and paper out and mod podged it on. I kind of love them. Happy St. Patty's Day! On to Easter!

Saturday, March 17, 2012

Baby Shower/St. Patricks Day Party!

My sweet friend is having a baby next week. Me and another friend Kate, threw her a baby shower and it just happened to fall on St. Patrick's Day. We thought it was meant to be because she is naming her baby Killian which is an Irish name. So we ran with it. Here is what we created!


The favors we made had an Irish saying along with some treats. I printed them with my sketch pens on the silhouette and then cut it out. I love that you can sketch things on the silhouette and leave the mat in it and then have it cut it.


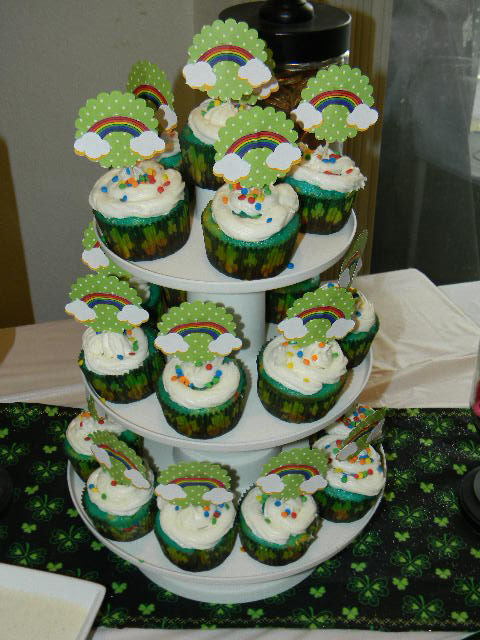
Kate spent a lot of time making these cupcakes. She split the batter up and colored them all. Then she layered them in the cupcake wrappers. I made the toppers. I again used my silhouette to cut them out. They took a little more time then I thought they would because I had to use the sketch pens for the rainbow first, then cut it out, then cut the clouds, banner and yellow background cloud, separately. Then I had to color the rainbow, glue it to the banner, then glue the white cloud to the yellow cloud, then glue them both to the rainbow.


It was a lot of work and I was sad to see them all thrown away after the party. I guess in hindsight, I could have just taken them off the used toothpicks and kept them for another party. Oh well, too late now.


I found this super cute idea on pinterest. It was pretty simple. I've had a lot of leftover clothes pins from another project and decided to use them up. Really, my silhouette did all the work. All I did was glue them to the clothes pin and roll them up.


The water bottles, I love. Again my silhouette did the work, I just had to assemble.


Here is the finished project.

We had a rainbow fruit platter with fruit dip clouds. Yummy veggies, cupcakes, spinach/artichoke dip with bread. It was delicious. My mother in law made me the apothecary jars and I love them. I filled them with lucky gold coins, skittles so we could taste the rainbow;-) and rainbow colored gumballs.


I made this cool subway art for it and sewed a little table runner out of festive fabric. The lucky banner took me forever to make. After all the cutting my silhouette has done, the blade is getting pretty dull, so I had to trim, cut and just help it along a bit. When all is said and done, it was a hit! I love how everything turned out!

St. Patty's Day Shirts

This year I decided to make the kiddos some St. Patrick's Day shirts. Do you remember being in elementary school and being really concerned about getting pinched on St. Patty's day? I do, and although my kids are still too young to understand the whole holiday, I wanted to make them one anyway.


Can I just say that I absolutely LOVE my silhouette? It can be used for ANYTHING! I found this cute fabric at Joanne's and browsed Pinterest for some inspiration. This is what I came up with. I saw a lot of Pinch Proof shirts on pinterest, but I didn't like the fonts so I girly-d it up a bit and kind of love how it turned out. The Sham- Rock t shirt is probably my favorite though. To cut fabric on the silhouette is pretty simple. You can use the silhouette brand interfacing or you can use Heat N Bond.

-Fuse it to the wrong side of your pre-washed fabric with the corresponding fabric setting on your iron.

-cut the height and width you'll need

-peel back the backing on the Heat N Bond and adhere to your mat.

Make sure to change your settings and blade to fabric with interfacing. The program usually tells me I need to change my blade to a 3, but after a few trials, I found that a 4 worked best.

-then place it on the surface you want to fuse it to and iron!

-voila! St. Patty's Day shirts!

It's been a learning curve with my silhouette machine. With all the different projects, I've learned something new. It's been really fun and I'm still sure there is more to figure out.


(isn't my little man adorable?)

All New!!

I decided to finally create a separate blog for my crafts and sewing projects. I chose the name Craft Closet Creations, because I am still an apartment dweller. We don't have much space. My craft/sewing supplies was overflowing EVERYWHERE, so my wonderful husband built me a "Craft Closet" in an attempt to contain it all in one space. My crafty friend Rachael gave me the idea.


When I say closet, I really mean closet. We took the doors down and installed a desk along with some drawers and cabinets.


I still feel like I'm bursting at the seams with supplies, but someday I'll have my own craft room. Until then, I will be happy with my Craft Closet and the creations that come out of it.

If you have any questions, comments, advice or project suggestions please let me know!

Enjoy!